PR Reviews
Codity helps streamline your Pull Request (PR) and Merge Request (MR) review process by providing insights and automation.
Getting Started with PR Reviews:
To enable PR review insights and automation, you first need to connect your repositories:
For GitHub Users:
- Sign in to Codity using your GitHub account.
- Navigate to the Dashboard.
- Click on the "Add GitHub Repositories" button.
- Follow the prompts to install the Codity GitHub App for your desired repositories or organization.
 Figure 1: Click the "Add GitHub Repositories" button on the Dashboard.
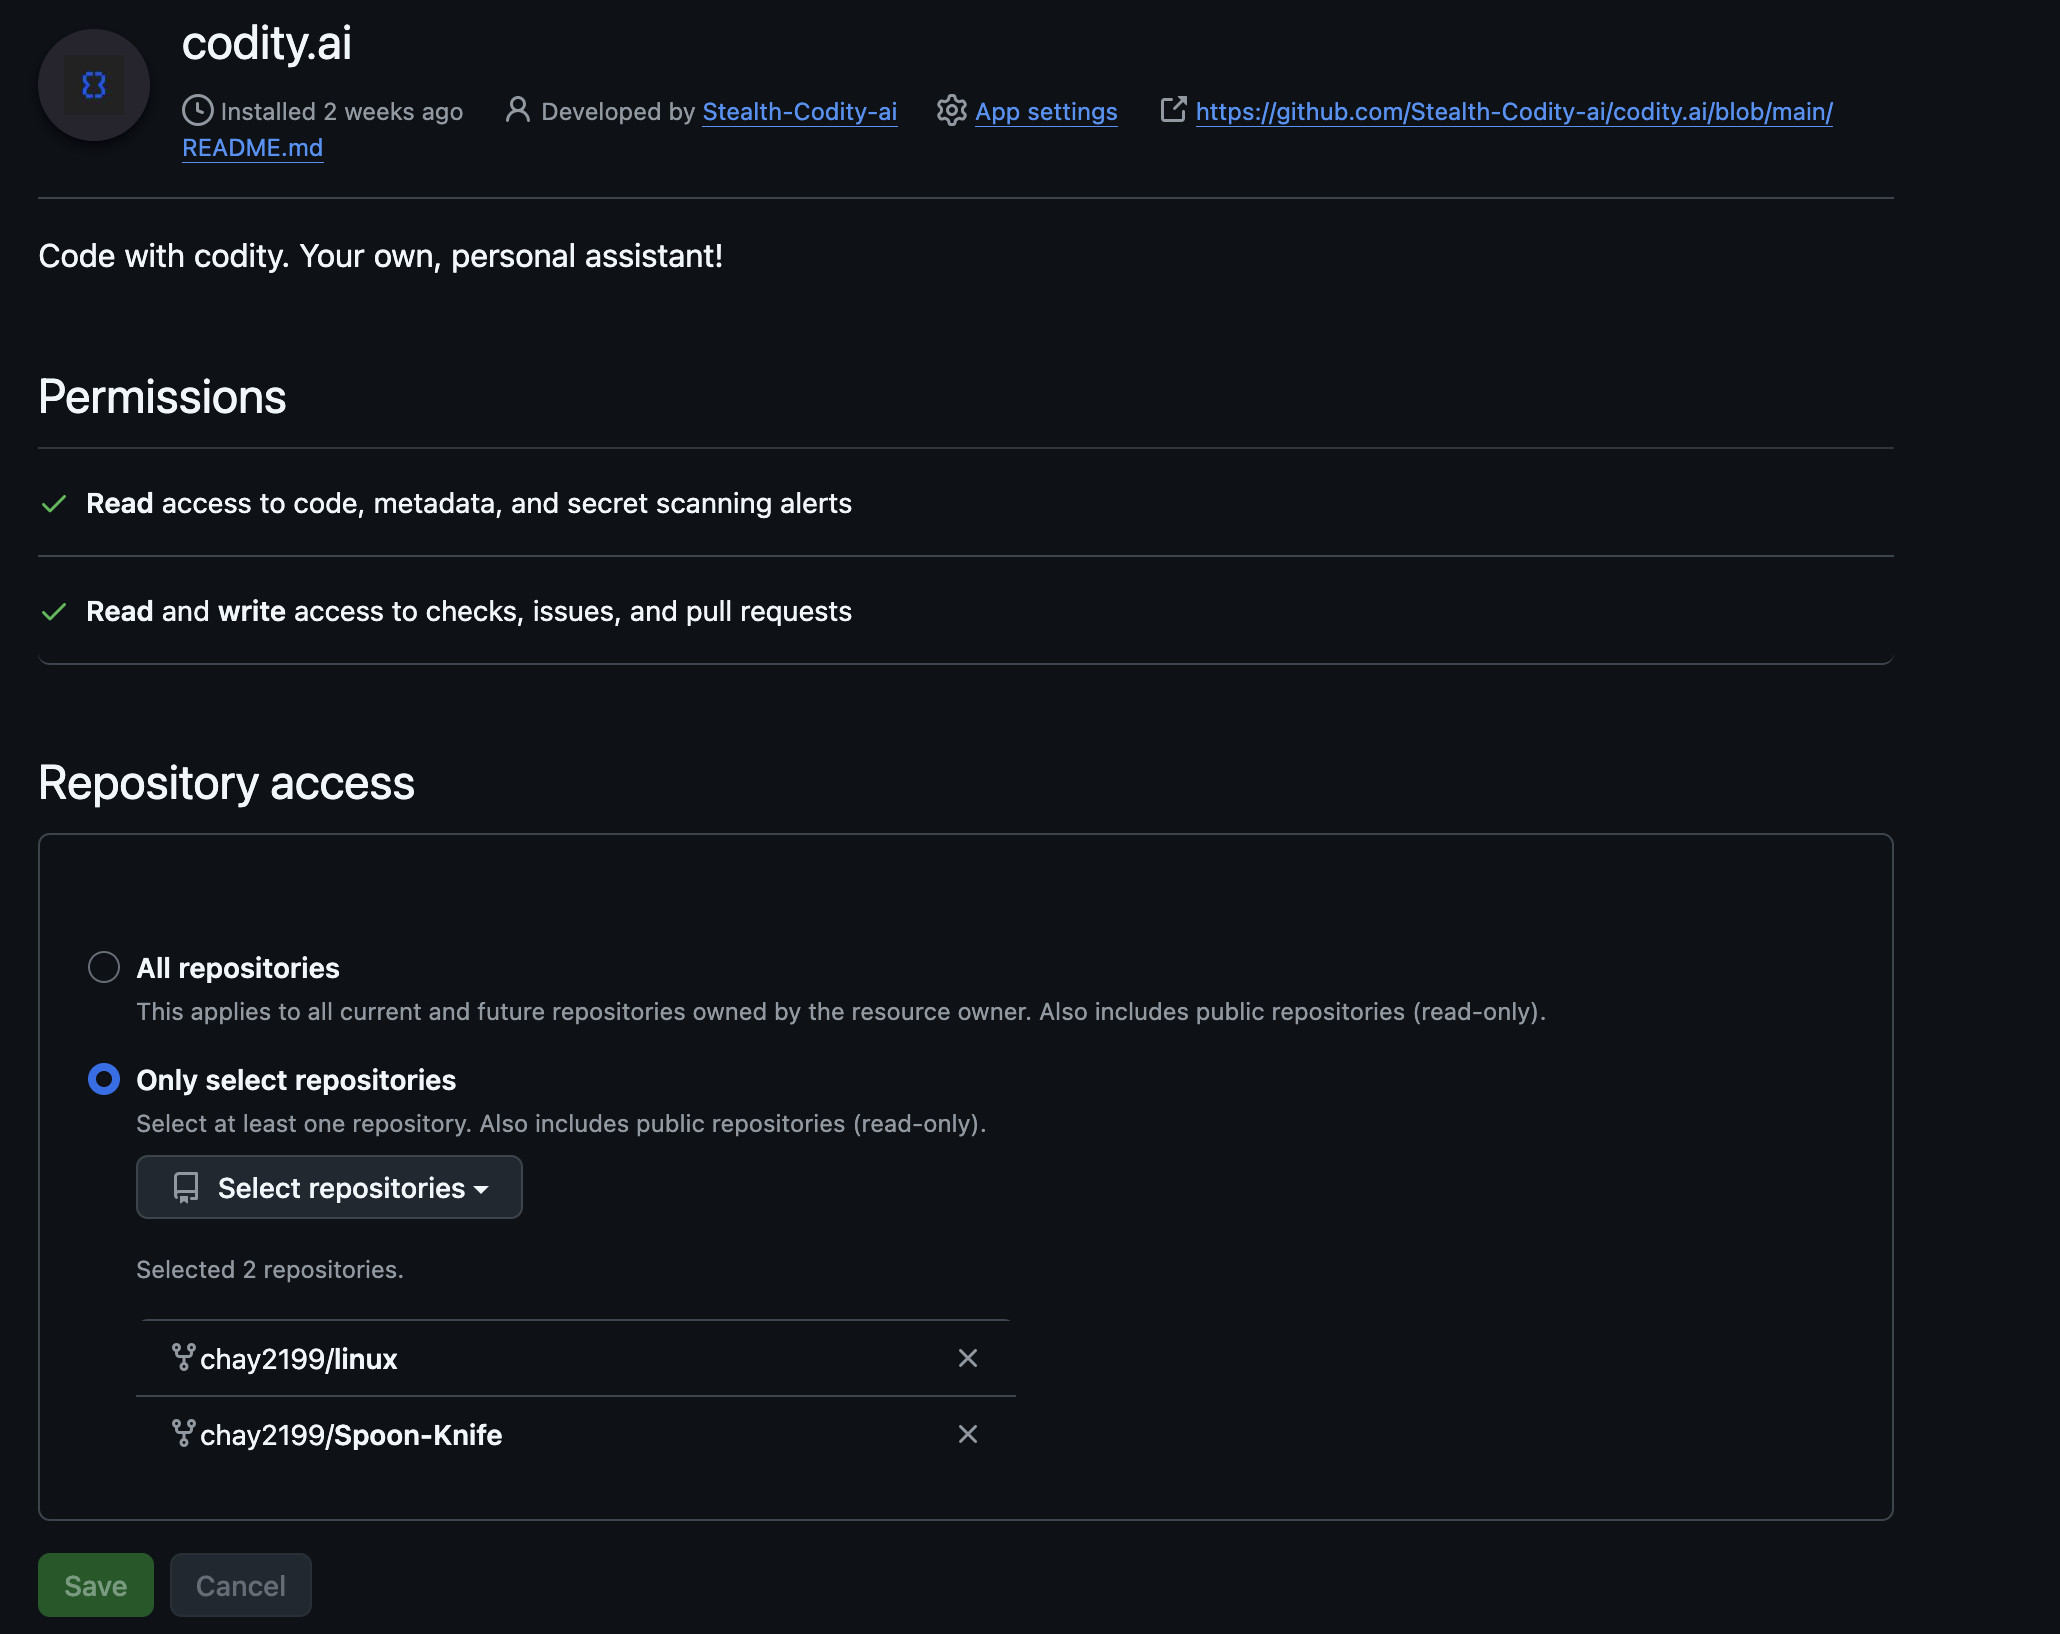 Figure 2: Authorize and install the Codity GitHub App.
For GitLab Users:
- First, you need to provide a GitLab Access Token to Codity. This is required for Codity to interact with your GitLab instance. You can set this up in your Codity Settings or if prompted on the dashboard.
- Once the token is added, navigate to the Dashboard.
- Click on the "Enable Repositories" button.
- Select the GitLab repositories you wish to monitor.
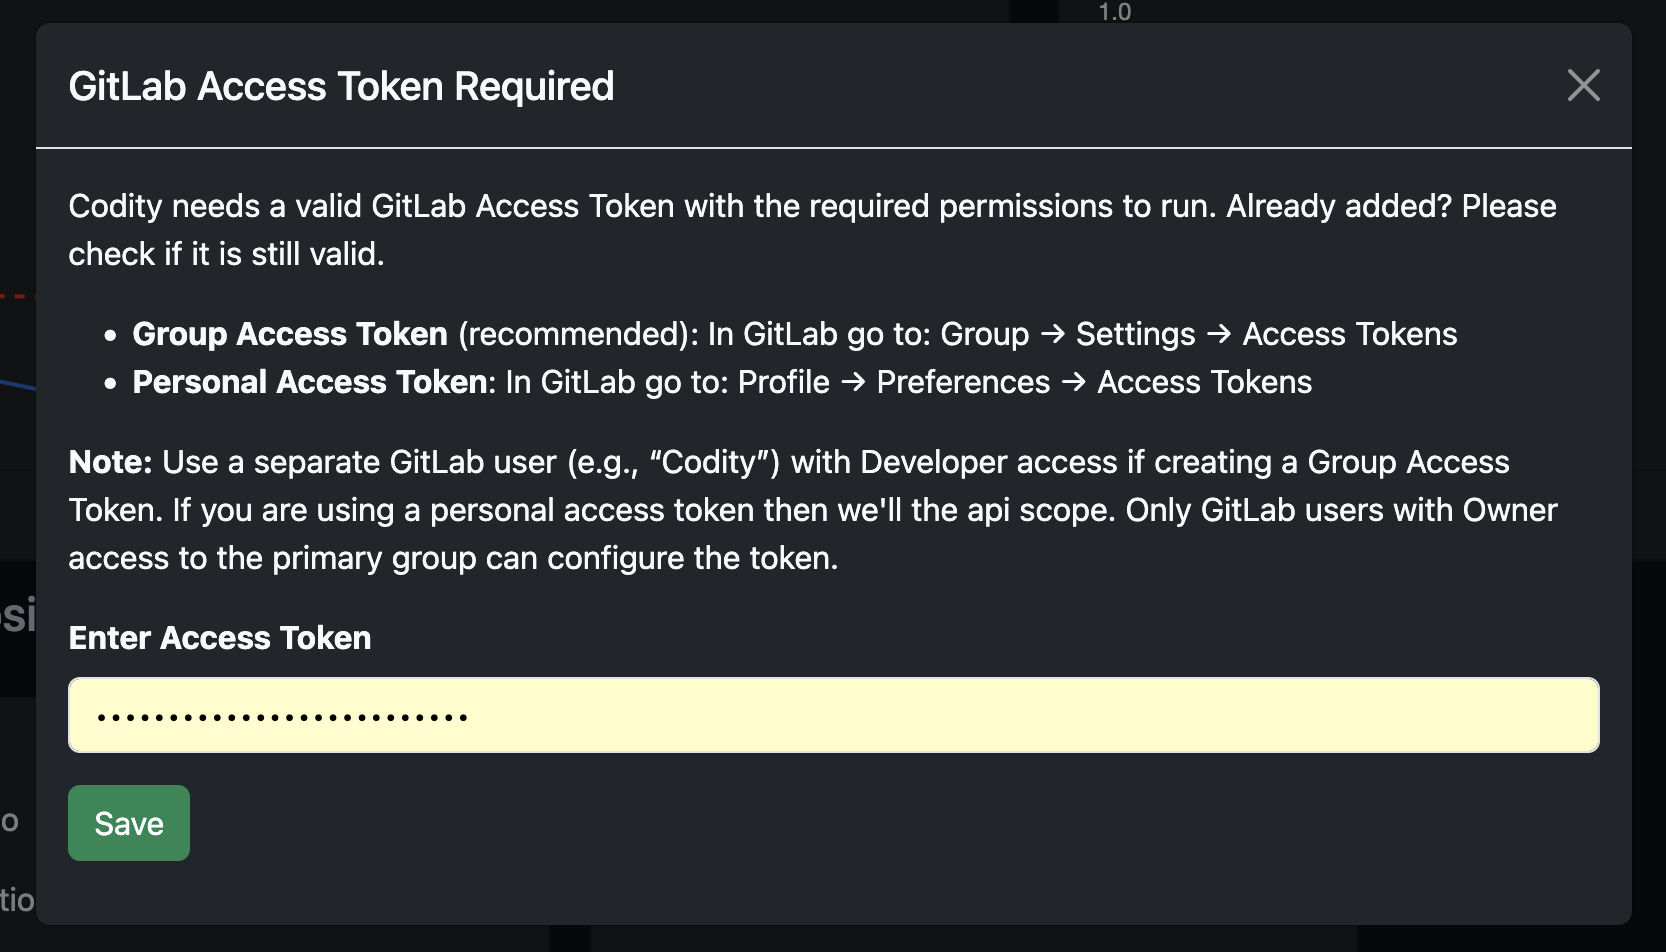 Figure 3: Enter your GitLab Access Token in the modal.
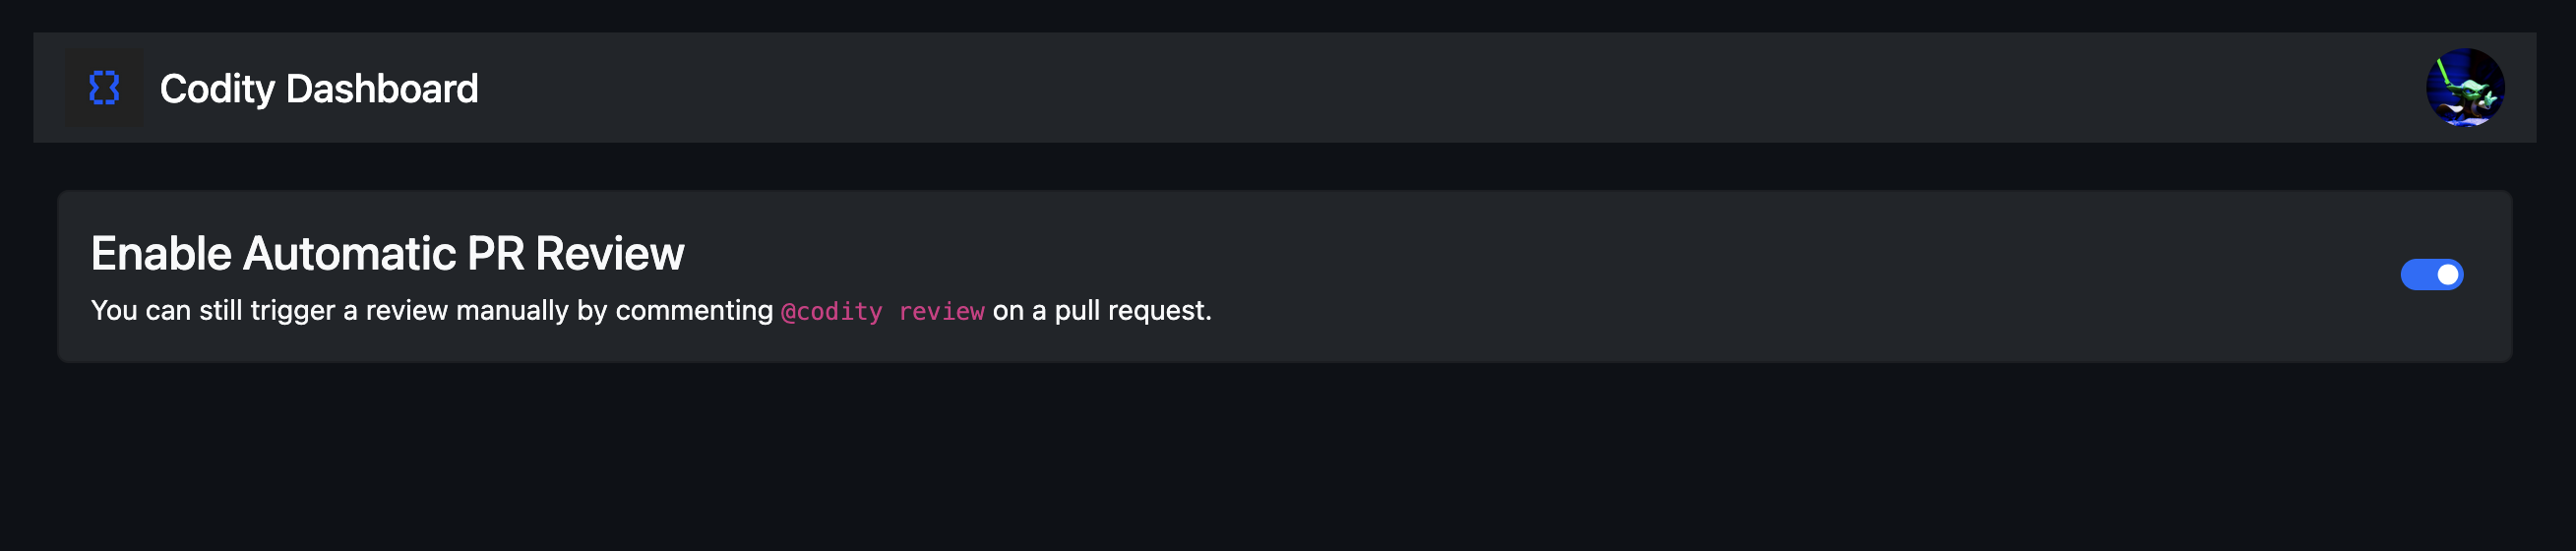 Figure 4: Click the "Enable Repositories" button on the Dashboard.
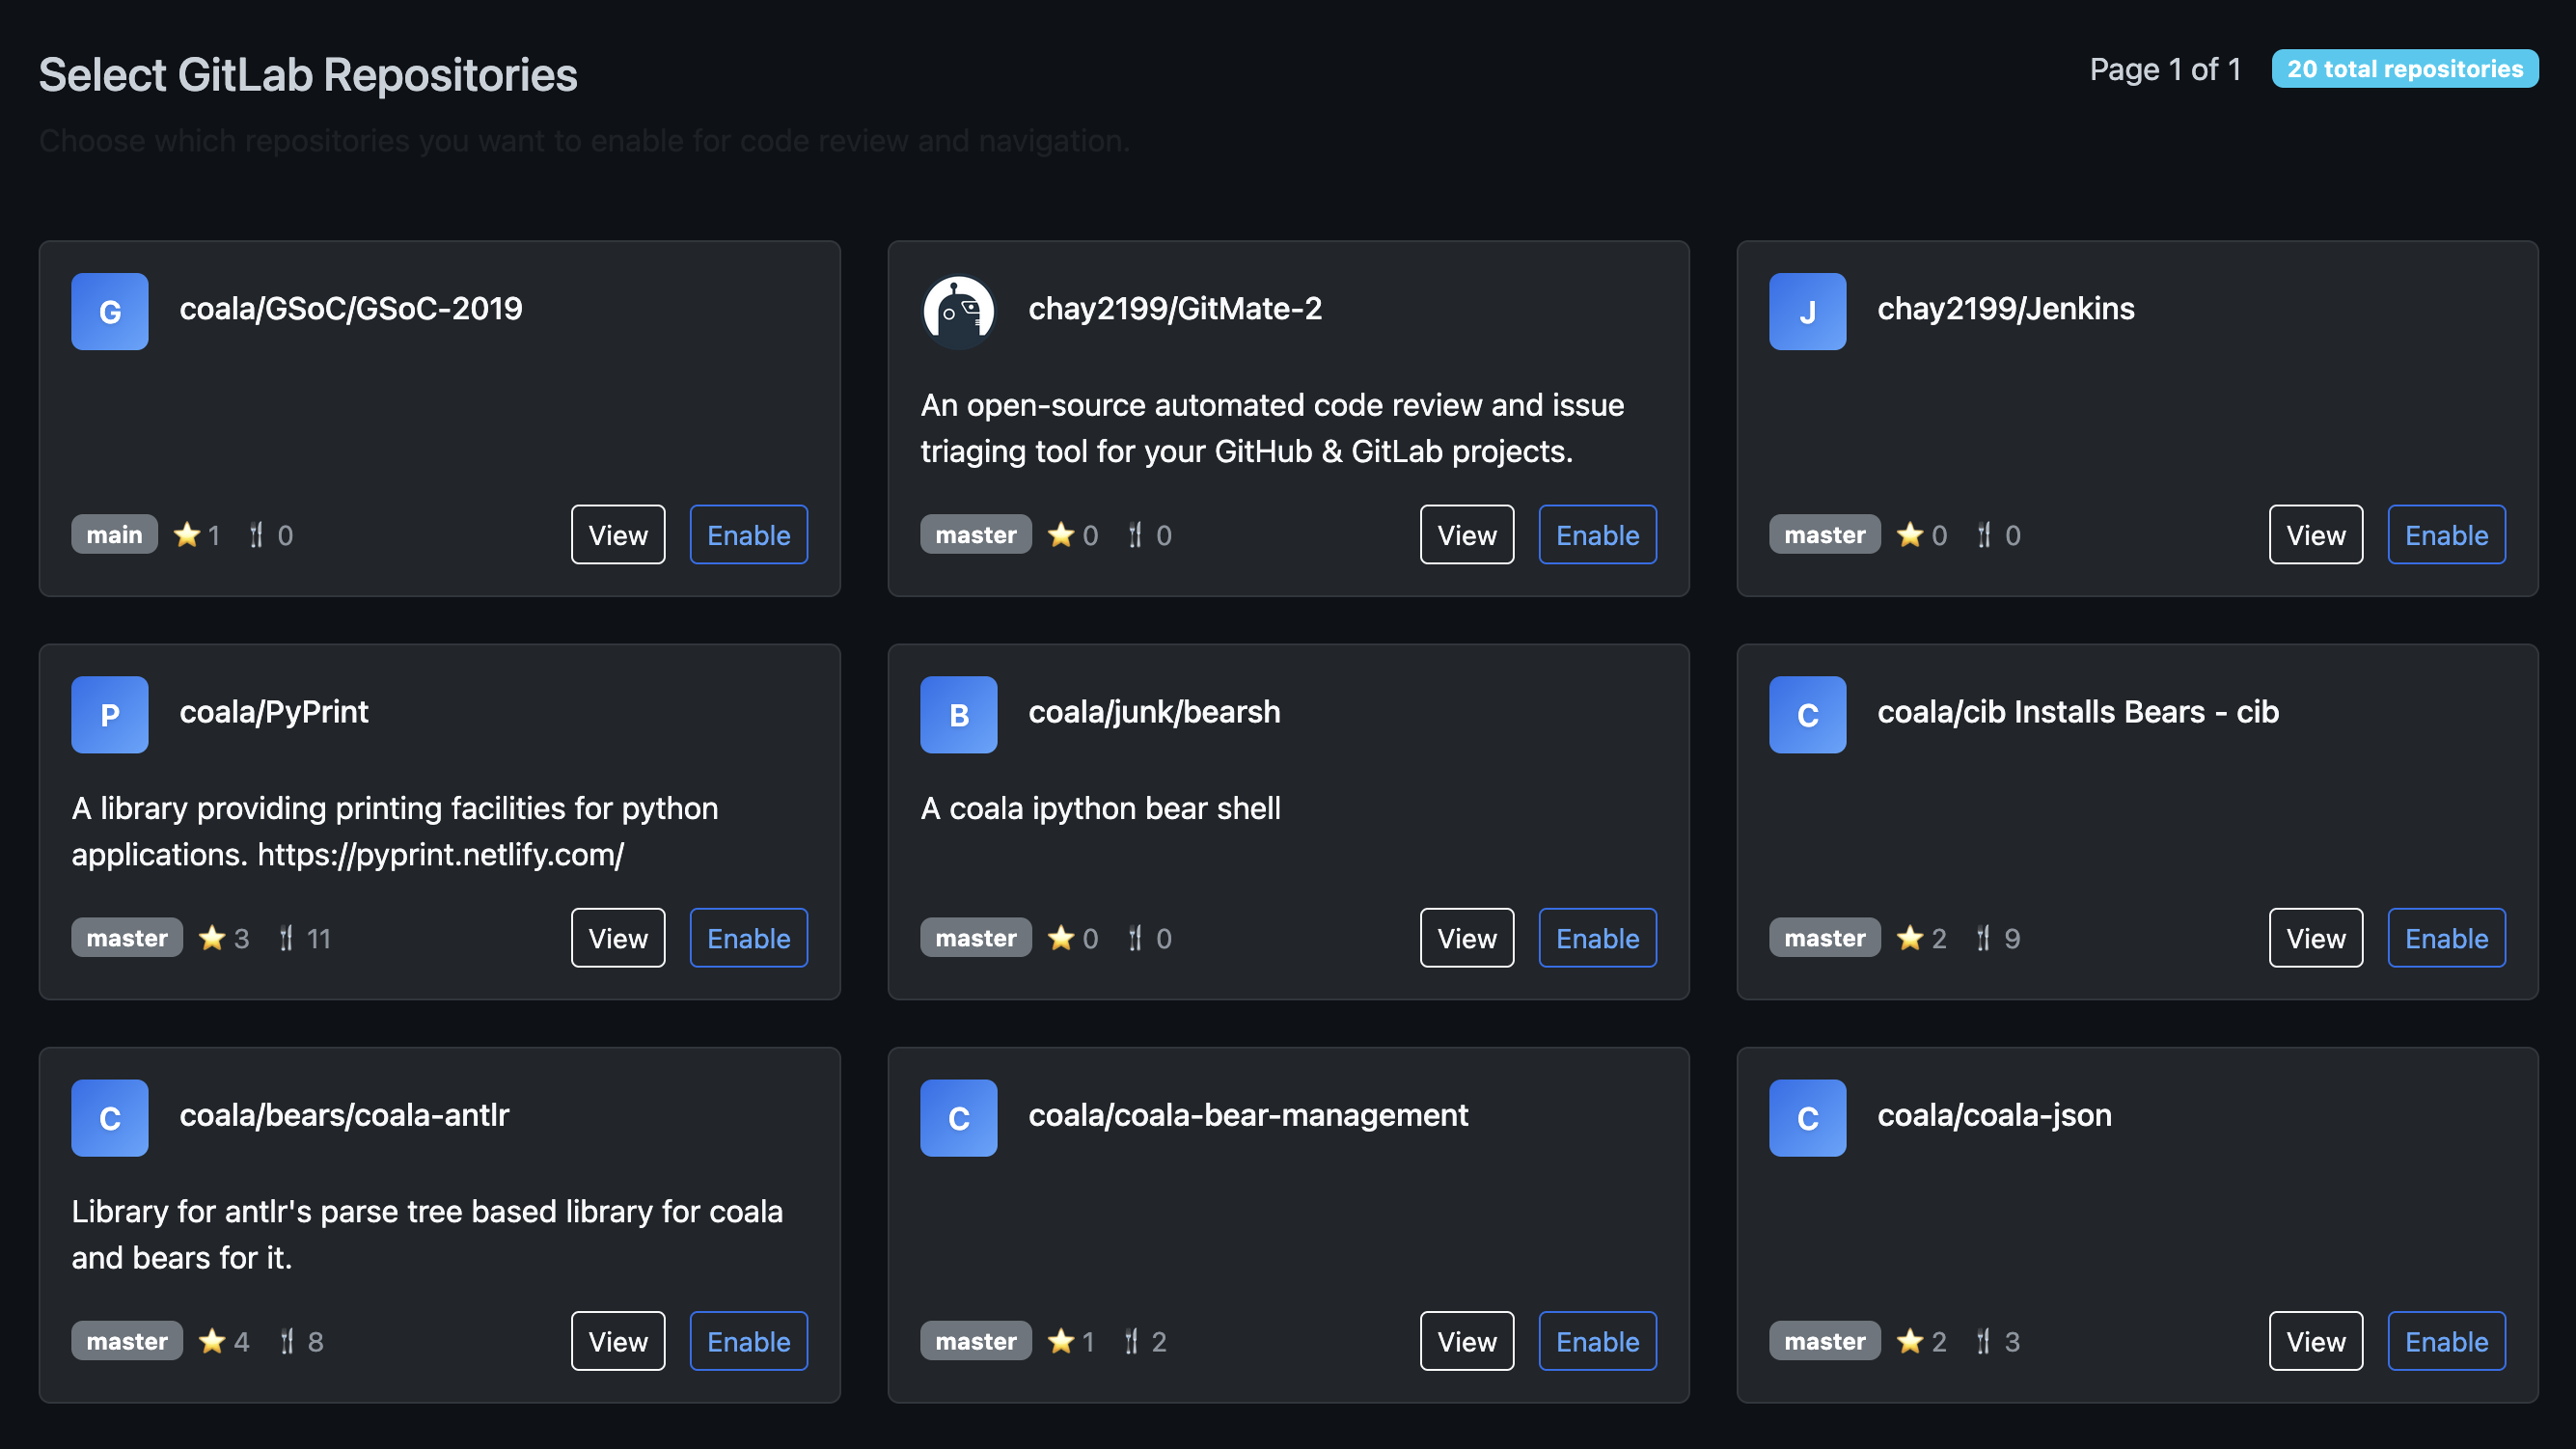 Figure 5: Select the GitLab repositories to enable Codity for.
Settings & Customization:
Codity provides several customization options in the Settings page to tailor your experience.
Auto-Review Toggle
Control whether Codity automatically reviews your PRs/MRs when they are opened or updated.
 Figure 6: Toggle Auto-Review ON/OFF in Codity Settings.
- Auto-Review Enabled: Codity will automatically provide review suggestions, code analysis, and summaries on your PRs/MRs as soon as they are opened or updated.
-
Auto-Review Disabled: You maintain full control and can request Codity's review assistance manually within your PR/MR comments. Simply add a comment with:
@codity review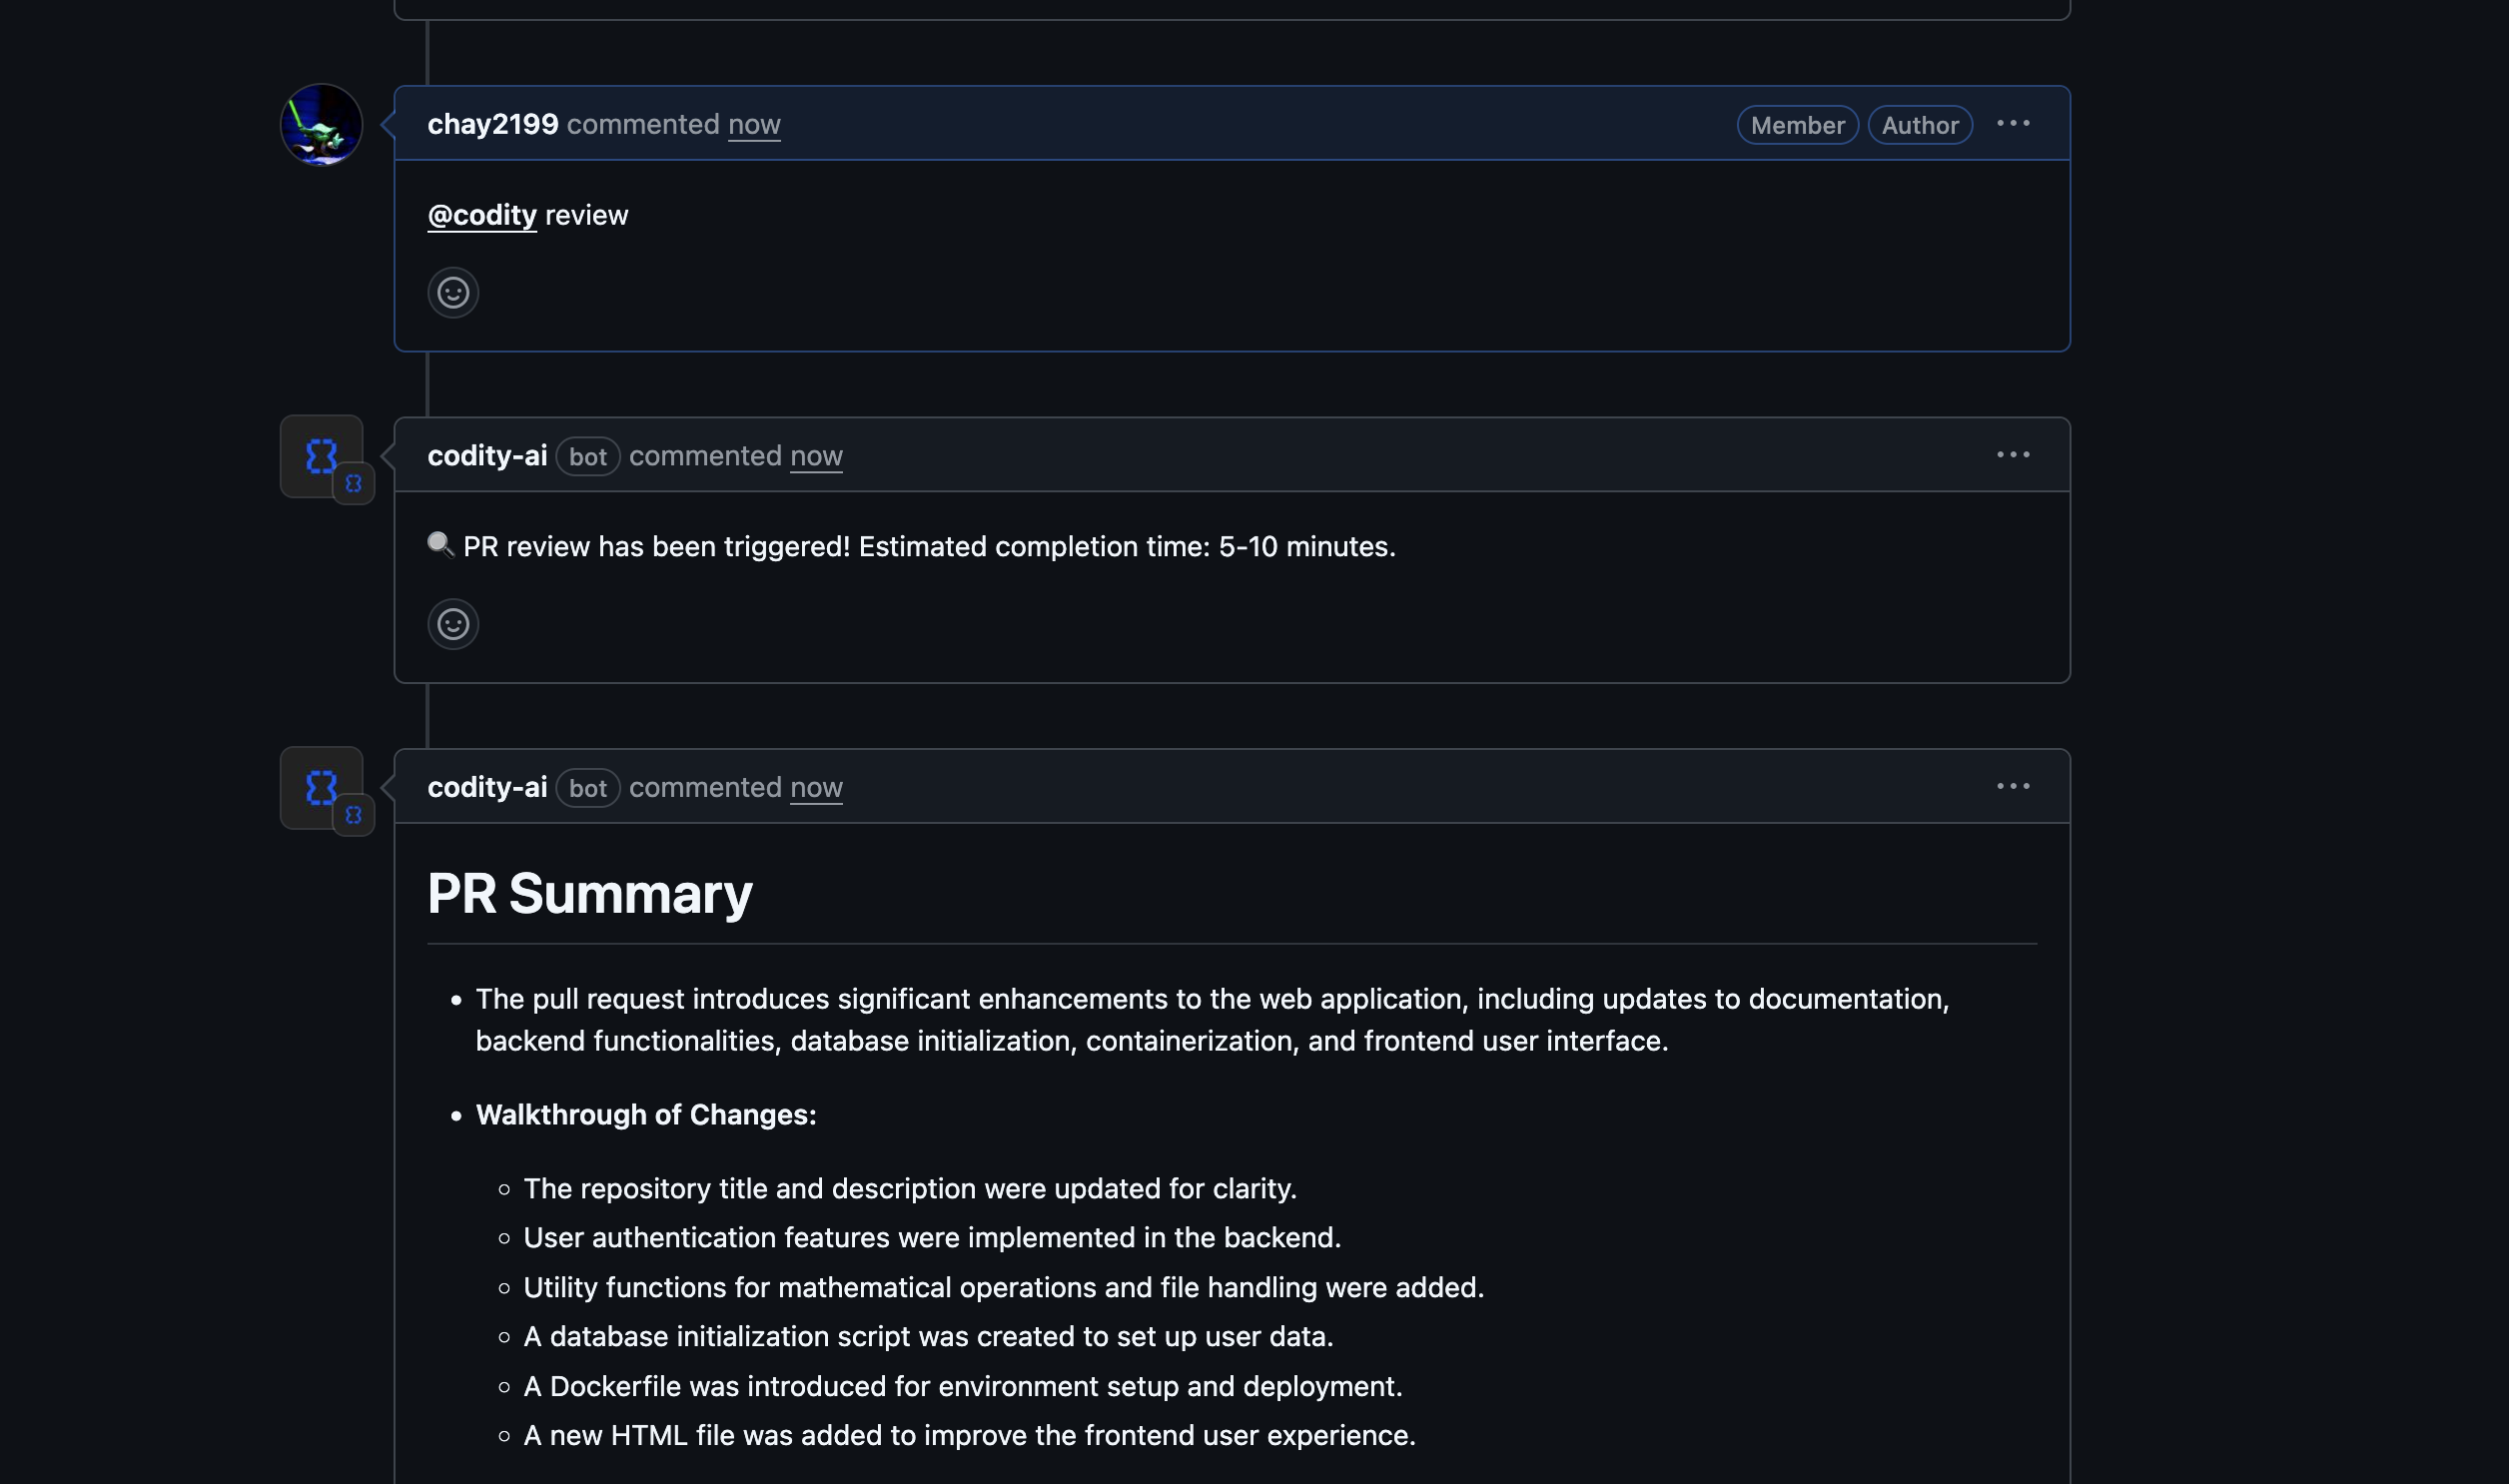 Figure 7: Example of using
 @codity reviewin a PR comment.
Workflow Diagrams Toggle
Enable or disable visual workflow diagrams in your PR reviews. This setting is configured per user and per organization/group.
-
Workflow Diagrams Enabled: Codity will automatically generate visual workflow diagrams showing:
- Function call flows and execution paths
- Class relationships and dependencies
- Module interactions and data flow
- Architecture changes introduced by the PR
These diagrams help you quickly understand the impact of code changes and visualize complex logic flows without having to trace through the code manually.
- Workflow Diagrams Disabled: Reviews will focus on textual analysis and code suggestions without generating visual diagrams. This can speed up the review process if you prefer text-based feedback only.
JIRA Integration
Connect your JIRA instance to Codity to automatically extract ticket requirements and verify that your Pull Requests implement all acceptance criteria defined in your JIRA tickets.
Setting Up JIRA Integration:
Step 1: Generate a JIRA API Token
- Go to your JIRA account settings at id.atlassian.com/manage-profile/security/api-tokens
- Click "Create API token"
- Give your token a label (e.g., "Codity Integration")
- Copy the generated token - you'll need this in the next step
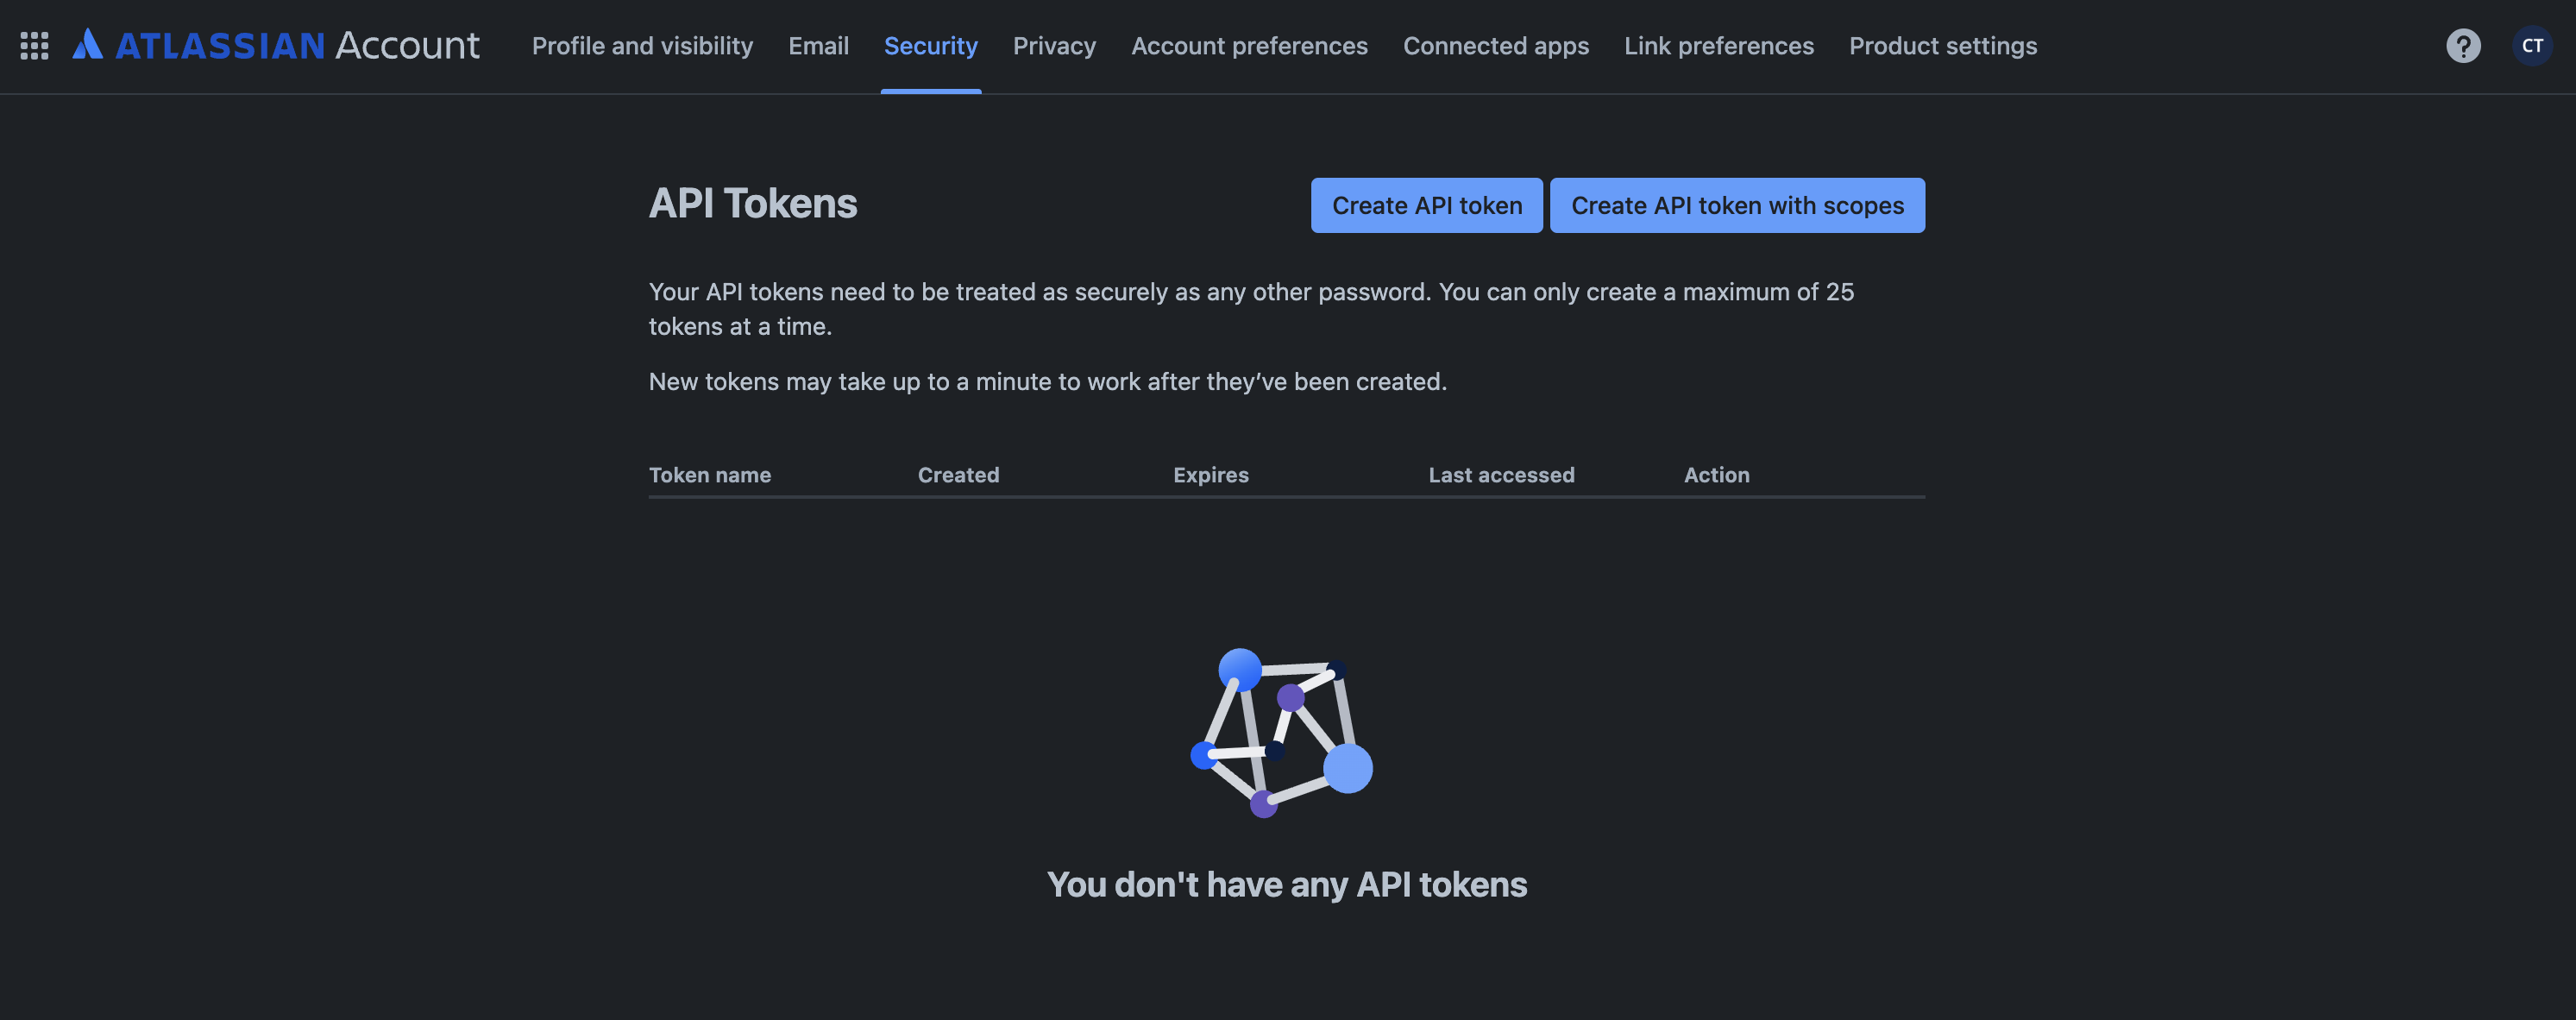 Figure 9: Generate a JIRA API token from your Atlassian account settings.
Step 2: Configure JIRA in Codity Settings
- Navigate to Settings in your Codity dashboard
- Scroll down to the "Integrations" section
- In the JIRA Integration card, fill in the following information:
- JIRA URL: Your Atlassian instance URL (e.g.,
https://your-company.atlassian.net) - JIRA Email: The email address associated with your JIRA account
- JIRA API Token: Paste the token you generated in Step 1
- Project Keys: Comma-separated list of JIRA project keys you want to track (e.g.,
PROJ, DEV, FEATURE)
- JIRA URL: Your Atlassian instance URL (e.g.,
- Click "Test Connection" to verify your credentials
- Once the connection is successful, click "Save Settings"
How It Works:
-
Link PRs to JIRA Tickets: Include your JIRA ticket ID in your PR title or description.
Examples:[PROJ-123] Add user authentication,Fix login bug (DEV-456) - Automatic Extraction: Codity will automatically detect the ticket ID and fetch the acceptance criteria from your JIRA ticket.
- Requirements Verification: During the PR review, Codity will verify that your code changes implement all the requirements listed in the JIRA ticket's acceptance criteria.
- Feedback: If any requirements are missing, Codity will post a comment on your PR highlighting which acceptance criteria haven't been addressed.
Tips for Best Results:
- Always include acceptance criteria as a bullet list in your JIRA ticket descriptions
- Use clear, specific acceptance criteria that can be verified in code
- Reference the JIRA ticket ID in your PR title for automatic detection
- Your API token is encrypted before storage for security
Code Navigation
Codity's Code Navigation feature is your AI-powered codebase assistant that helps you quickly understand code, find implementations, trace dependencies, and get answers about your repository—all directly within your Pull/Merge Request comments, without leaving your development flow.
How to Use Code Navigation:
You can start using code navigation by clicking on the tab on the dashboard sidebar or In any of your PR/MR comments (or even on Issues and Commits for GitLab), simply mention
@codity followed by your question.
Codity will analyze your codebase and provide contextual answers.
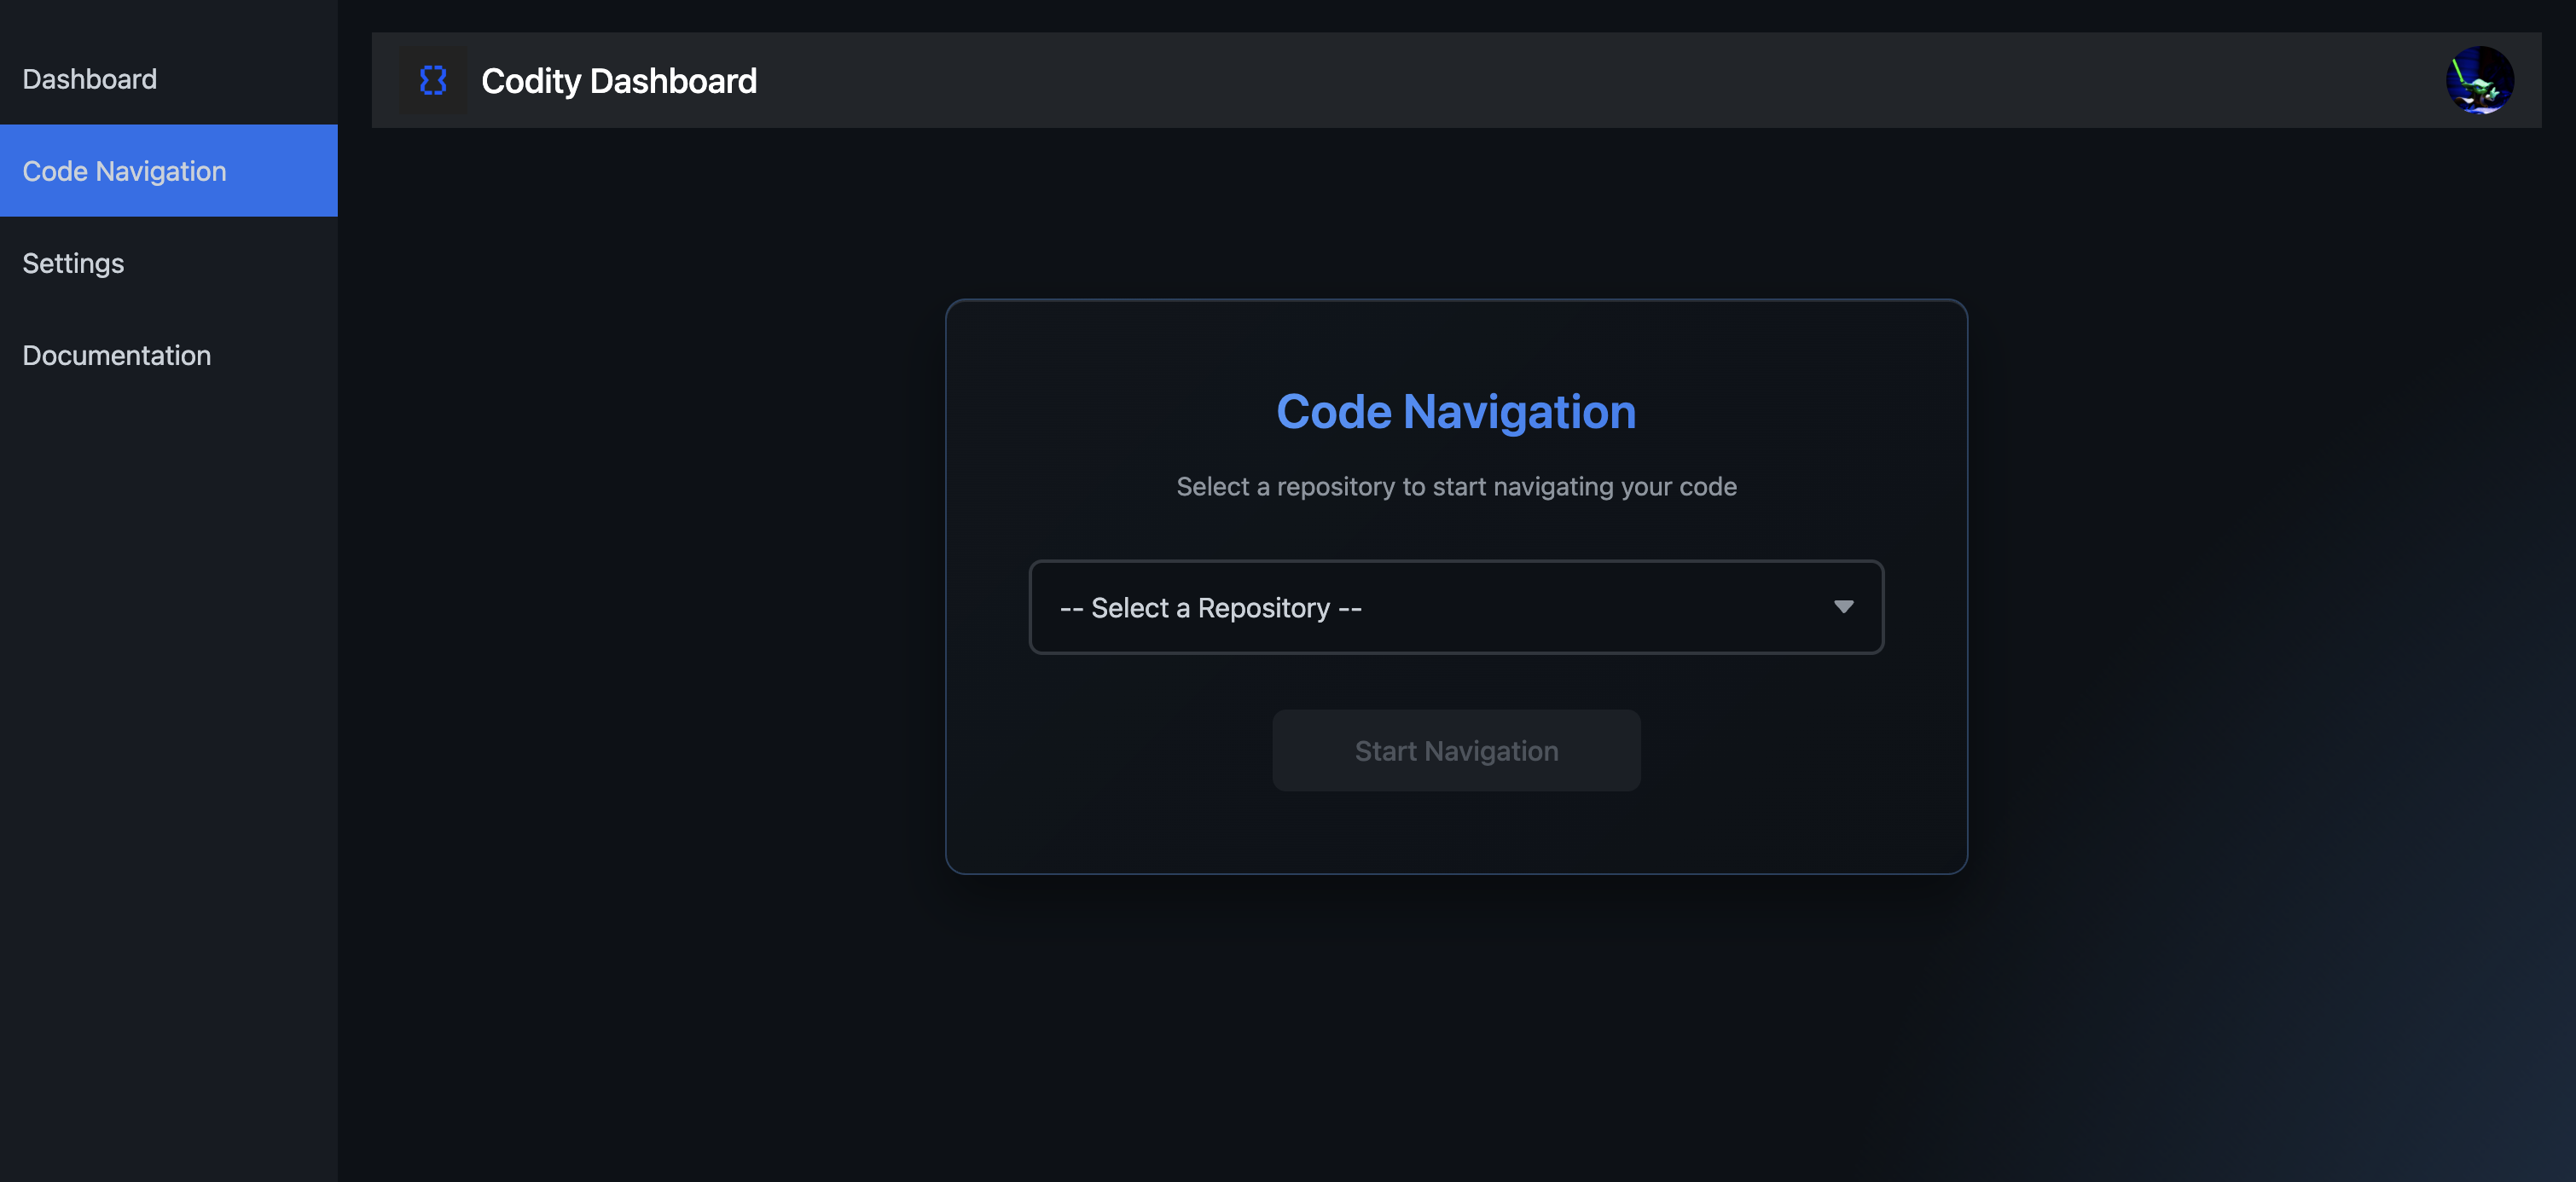 Figure 10: Start talking to your code base by selecting a repo.
Example Queries:
@codity Why is my calculateArea function returning incorrect values?@codity Explain how the authentication flow works in this codebase@codity Where is the user login functionality implemented?@codity Show me all files that handle database migrations@codity Explain the architecture of the 'auth' module@codity How does the payment processing system integrate with the API?@codity What could cause a null pointer exception in the UserService?@codity Why might the API be returning 500 errors?@codity What files depend on the User model?@codity Which modules are using the old authentication library?Advanced Features:
Multi-Branch Search
For GitLab users, Codity supports searching across multiple branches simultaneously using the
@codity navigate command. This is particularly
useful when you need to compare implementations across different branches or find code in feature branches.
@codity navigate Where is the payment gateway implemented?Note: You can select which branches to search in the Code Navigation interface on the dashboard.
Contextual Thread Responses
When you reply to existing comment threads (including diff comments), Codity automatically considers the context of previous messages in the thread. This allows for more natural, conversational interactions where you can ask follow-up questions without repeating context.
Where Code Navigation Works:
- GitHub: Pull Request comments (general and review comments)
- GitLab: Merge Request comments, Issue comments, and Commit comments
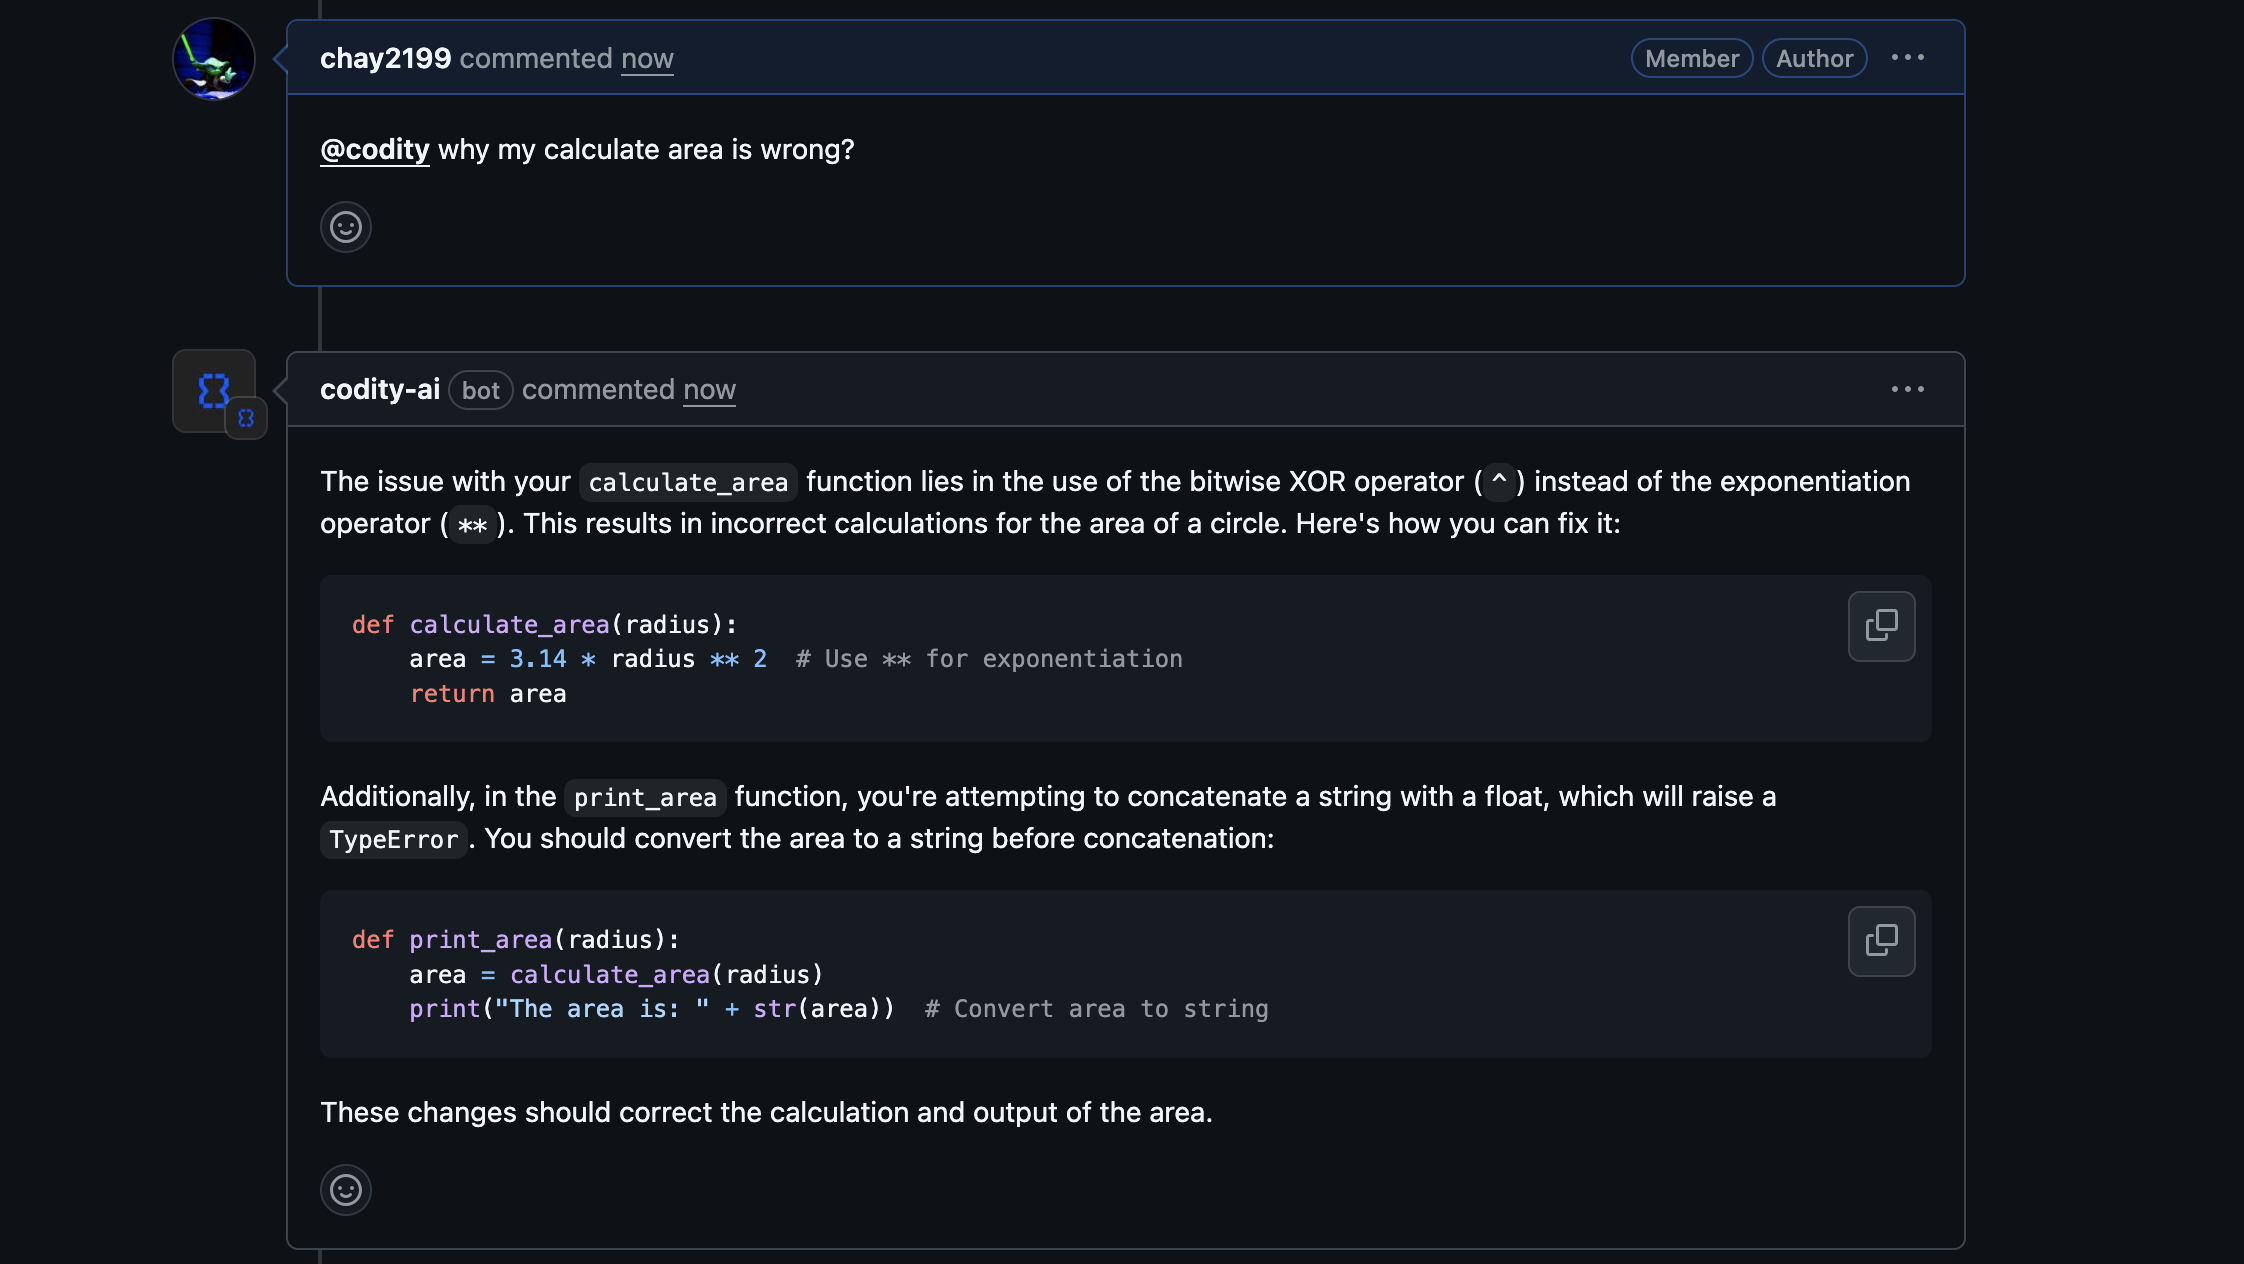 Figure 11: An example of Codity's response to a code navigation query.